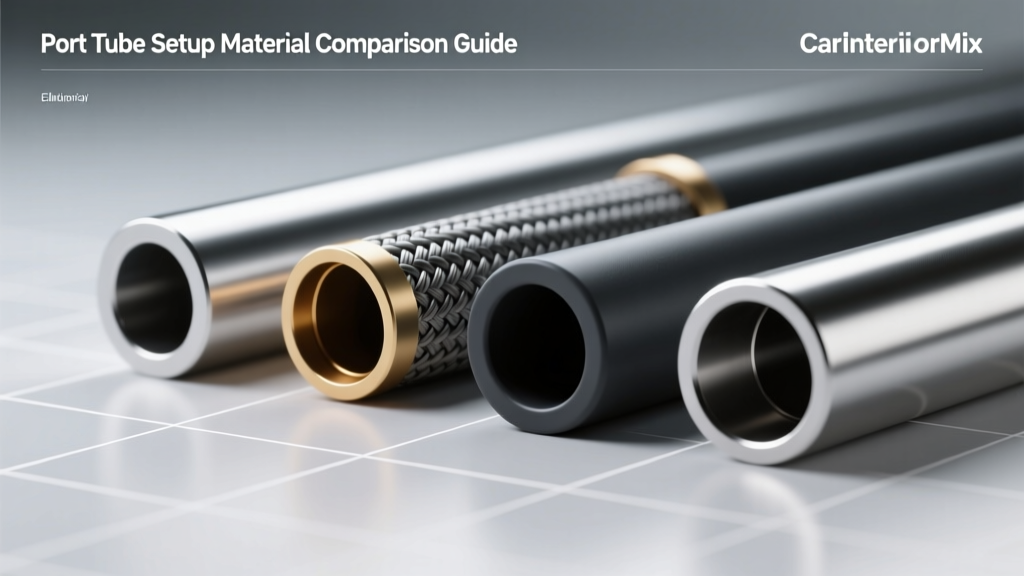
Port Tube Setup Material Comparison Guide - CarInteriorMix
A port tube setup can make or break the way your car audio system feels from the driver?s seat. The right port tube (and the right material) helps your subwoofer move air efficiently, hit lower notes with authority, and keep bass clean instead of boomy or ?one-note.? The wrong choice can create chuffing noise, rattles, weak output, and a tuning frequency that drifts once the cabin heats up.
For car owners building or upgrading a subwoofer enclosure?whether it?s a compact trunk box or a space-saving hatchback setup?port tube material is one of the most overlooked decisions. Most people focus on subwoofer size and amplifier power, then throw in whatever port they can find. This guide compares common port tube materials, shows how they affect sound and durability, and gives you a practical way to choose the best option for your vehicle and listening style.
You?ll also find step-by-step tips for measuring, installing, and sealing a port tube correctly, plus real-world examples and mistakes that cause noise and lost output.
What a Port Tube Does (and Why Material Matters)
A ported (bass reflex) enclosure uses a tuned opening to reinforce low frequencies. The port tube is the ?air piston? that moves in and out of the enclosure at the tuning frequency. When the port is efficient, you get:
- More output around the tuning frequency (often 28?38 Hz for car audio)
- Less cone movement near tuning, which can reduce distortion
- Deeper perceived bass with the same amplifier power
Material affects performance because it influences:
- Rigidity: Flexing can change tuning and add noise.
- Surface smoothness: Rough interiors can increase turbulence (port noise).
- Wall thickness: Thin tubes can resonate, vibrate, or crack.
- Temperature stability: Cabin heat can soften some plastics slightly and change behavior over time.
- Ease of sealing: Air leaks around the port kill output and add whistling.
Key Factors to Compare Before Choosing a Port Tube Material
1) Airflow and Port Noise (Chuffing)
Port noise usually comes from high air velocity and turbulence at the port ends. Material influences this through inner surface finish and how well you can flare the ends. A smooth tube with proper flares generally wins, regardless of the base material.
2) Strength and Vibration Control
Trunks and hatch areas shake. Thin or flexible tubes can vibrate against the enclosure wall or resonate like a drum. Stiffer materials tend to stay quieter and keep tuning more consistent.
3) Ease of Cutting, Fitting, and Sealing
Even a ?perfect? port design will underperform if it?s hard to mount straight, hard to seal, or difficult to trim accurately. DIY-friendly materials matter if you?re building at home with common tools.
4) Cost and Availability
Some materials are easy to find at a hardware store (PVC), while others are usually ordered from car audio brands (aero ports) or specialty suppliers.
Port Tube Material Comparison (Real-World Pros and Cons)
PVC (Schedule 40) Pipe
Best for: Budget builds, DIY enclosures, reliable everyday setups
- Pros:
- Inexpensive and widely available
- Rigid enough for most subwoofer boxes
- Easy to cut and sand
- Can be paired with couplers and elbows for custom routing
- Cons:
- Not designed as an audio port, so flares must be improvised or purchased separately
- Some fittings reduce internal diameter and create turbulence
- Can look ?industrial? if appearance matters
Practical tip: If you use PVC, prioritize a clean cut, a smooth inner edge, and a flare (or at least a generous round-over) on the ends to reduce chuffing.
ABS Plastic Tube
Best for: Lightweight builds, cleaner aesthetics, moderate-power systems
- Pros:
- Lightweight and easy to work with
- Often smoother and nicer-looking than basic PVC
- Good general durability
- Cons:
- Can be less rigid depending on wall thickness
- May resonate more than thicker PVC if unsupported
- Not all ABS tubes are equal?quality varies
Real-world example: A daily-driven sedan with a single 10-inch sub tuned to ~34 Hz can run ABS quietly if the port is short, well-supported, and properly flared.
Aero Ports (Flared Port Kits)
Best for: Performance builds, higher-power systems, minimizing chuffing
- Pros:
- Designed for audio with flares that reduce turbulence
- Typically provides the cleanest airflow per diameter
- Professional appearance
- Easy to tune by cutting the center tube section
- Cons:
- More expensive than hardware-store pipe
- Some kits are not very thick?may need bracing in extreme setups
- Diameter options can be limited versus DIY pipe sizes
Why enthusiasts like them: If you?re chasing strong low bass without port noise, a properly sized flared port kit is often the easiest path to ?loud and clean.?
Aluminum (or Metal) Tube
Best for: High-output builds where rigidity matters; custom show-quality fabrication
- Pros:
- Very rigid and resistant to vibration
- Can look premium in show installs
- Holds shape well, less likely to crack
- Cons:
- Harder to cut and flare cleanly without the right tools
- Can transmit vibration if it contacts the enclosure or vehicle body
- Must be carefully deburred (sharp edges create turbulence and risk injury)
Practical tip: Metal ports can be extremely quiet if both ends are smoothly radiused or properly flared. If you can?t flare it, at least round over and polish the inner lip.
Cardboard/Sonotube-Style Forms (Rare in Cars)
Best for: Temporary mockups, experimentation, or prototypes
- Pros:
- Cheap and easy to cut
- Useful for testing lengths before committing
- Cons:
- Moisture and heat can degrade it
- Not ideal for long-term vehicle use
- Harder to seal perfectly
Bottom line: Great for a test fit, not great for a trunk that sees humidity, spills, and temperature swings.
Quick Recommendations by Use Case
- Daily driver on a budget: Schedule 40 PVC with rounded edges or add-on flares.
- Clean bass with minimal port noise: A quality aero port kit (proper diameter, proper length).
- High-power SPL leaning setup: Larger-diameter port (often 4?6 inches depending on power/woofer) with flares; consider metal or thick PVC for rigidity.
- Space-limited builds: PVC with elbows can help packaging, but avoid tight bends close to the port mouth.
Step-by-Step: How to Choose the Right Port Tube Material and Setup
Step 1: Confirm Your Enclosure Design (or Start with a Proven One)
Before picking material, know your target:
- Net box volume (after subtracting sub displacement, bracing, and port displacement)
- Target tuning frequency (common: 30?36 Hz for musical daily setups)
- Target port diameter/area (bigger reduces air velocity and noise)
Real-world example: If you have a 12-inch sub in a 1.75 ft� net box tuned to ~32 Hz, a 4-inch port might work for moderate power, but higher power often benefits from more port area (or a slot port). Material won?t fix a port that?s too small.
Step 2: Pick Diameter First, Then Material
Port noise is usually solved by sizing, not by material alone. Use these practical guidelines:
- 3-inch ports: Often OK for smaller subs or modest power
- 4-inch ports: A common ?sweet spot? for many 10s and 12s
- 6-inch ports: Better for higher power or multiple subs, but needs space and often longer length
Once diameter is chosen, pick the material that fits your tools and goals:
- DIY tools/basic budget: PVC
- Cleanest airflow with less work: Aero port
- Show build or maximum rigidity: Aluminum/metal (if you can finish it properly)
Step 3: Choose a Flare Strategy
Flares reduce turbulence at the port opening. Your options:
- Purpose-built flares: Best results, easiest path
- Round-over with a router: Works well if you can radius the port entry/exit
- Sanding and shaping: Better than a sharp edge, but be consistent
Step 4: Test Fit and Plan Clearance
Port ends need breathing room. Try to maintain at least one port diameter of clearance between the port end and any wall inside the box. Also confirm clearance in the trunk/hatch so the external flare or port mouth isn?t blocked by carpeting, seatbacks, or trim.
Step 5: Cut, Deburr, and Seal
- Measure twice: Port length changes tuning. Small length changes can matter.
- Cut square: A crooked cut can create gaps and uneven airflow.
- Deburr inside and out: Remove sharp edges?sharp lips can whistle.
- Dry fit: Make sure the port sits straight and doesn?t touch internal bracing.
- Seal completely: Use a reliable sealant (silicone or polyurethane) around the mounting area. Avoid gaps.
- Secure against vibration: Add a bracket or support for long/heavy ports so they don?t flex or buzz.
Product Comparisons and Shopping Tips (What to Look For)
You don?t need a specific brand to get good results, but you do want the right features. When comparing port tube options, focus on:
- Wall thickness: Thicker generally resists vibration better.
- Flare size: Larger, smoother flares help reduce chuffing.
- Modularity: Kits that allow you to swap center tubes make tuning adjustments easier.
- Mounting flange quality: A rigid, flat flange seals better to MDF/plywood.
- Interior smoothness: Especially important if you?re using non-audio pipe or adapters.
Simple comparison:
- PVC + DIY round-over: Best value if you?re comfortable cutting and finishing.
- Aero port kit: Best ?plug-and-play? option for clean airflow.
- Metal tube: Best stiffness and looks, but demands careful finishing and mounting.
Common Mistakes to Avoid
- Choosing material to fix a too-small port: A 3-inch port will still chuff at high power even if it?s made of aluminum.
- Sharp port edges: Square cuts and sharp lips are a recipe for noise.
- Not accounting for port displacement: The port takes up box volume and changes tuning if ignored.
- Insufficient internal clearance: A port too close to the box wall restricts airflow and shifts tuning.
- Loose mounting or no support: Long ports can vibrate, buzz, or crack at the joint.
- Air leaks around the port: Leaks reduce output and can create weird whistling sounds.
- Using tight elbows near the port mouth: Bends can add turbulence and alter effective length.
FAQ: Port Tube Setup Material Questions
What?s the best port tube material for a car subwoofer box?
For most daily drivers, Schedule 40 PVC or a quality aero port kit gives the best mix of performance, cost, and ease of installation. If your priority is the cleanest airflow with the least DIY work, aero ports usually win.
Will changing port material change the tuning frequency?
If the internal diameter and length are the same, material alone usually doesn?t dramatically change tuning. What does change tuning is accidentally altering length during installation, adding fittings that narrow the internal diameter, or creating leaks.
How do I reduce port noise (chuffing) without rebuilding the box?
- Add or upgrade flares on one or both ends
- Increase port area (if possible) or switch to a different port solution
- Lower subsonic content with a subsonic filter and confirm your tuning
- Check for air leaks around the port and enclosure seams
Is a metal port louder than a plastic port?
Not automatically. Loudness comes from correct tuning, sufficient port area, and clean airflow. Metal can be quieter mechanically (less flex), but it can also transmit vibration if it touches the enclosure or car body. Fitment and support matter more than the material badge.
Can I use PVC elbows to fit a long port in a small trunk?
You can, but be careful. Elbows can add turbulence, and some fittings reduce the inner diameter. If you must use bends:
- Use gentle bends when possible
- Avoid placing an elbow right at the port entrance/exit
- Keep the internal path smooth and deburred
When should I choose a slot port instead of a port tube?
If you need a lot of port area but don?t have room for a large-diameter tube, a slot port built into the enclosure can be more space-efficient. Slot ports also allow strong bracing integration, but they require more precise woodworking to avoid turbulence and panel resonance.
Conclusion and Next Steps
If you want bass that sounds strong, controlled, and free of annoying port noise, start by sizing the port correctly, then choose a material that fits your build style. For many car audio enthusiasts, PVC is the best value, while aero port kits offer a clean, proven solution with minimal fuss. Metal ports can be excellent for high-rigidity or show-quality installs?just take the time to finish the edges and mount them securely.
Next steps you can take today:
- Confirm your enclosure?s net volume and target tuning frequency
- Check whether your current port has sharp edges, leaks, or clearance issues
- Decide if you want to upgrade to flares or a larger-diameter port solution
- Do a quick listening test: play bass-heavy tracks and listen for chuffing near peak notes
Want more practical car audio and interior-friendly upgrade guides? Explore more how-tos and comparisons on carinteriormix.com.